


Overland Ready: Snorkel Installation for the 93+ Ford Ranger [PART 1]
- Apr 20
- 11 min read

When it comes to Snorkels on offroad vehicles there always seems to be some "mystery" of what is a snorkel? What does it do? And do I really need one, or do I just want one? So before we get deeper into this image heavy installation article, we're going to dive into snorkels a little first.
Starting off, lets explain what a snorkel is. A snorkel kit's primary function was to be a cleaner source of fresh air higher above the vehicles overall tires rotating and disturbance of air, and when in caravans or groups, instead of the airflow full of dust and dirt being able to be huffed into the stock air cleaner box pick up, it's drawn in from a higher source of much cleaner and cooler air, most often still in the vector of airflow over the vehicle that rushes in a ram-air like effect.
We all already know how much better your engine performs with cooler more dense air coming in resulting in a more efficient burn with higher levels of oxygen. Better combustion leads to better power, better power leads to better mileage results, and the collective results from all of these adds to cooler under-hood temps as the engine operates at a lower temperature, reducing the risk of overheating and improving longevity of your oil and engine overall.
The side benefits to this is also a higher elevated source of air to pull from, adding to the vehicles ability to traverse deeper water crossings without hydro-locking an engine increasing the OE wading depth. This refers to the maximum depth of water a vehicle can safely traverse without risking damage to critical components like the engine, air intake, electronics, and transmission.

Different vehicles have varying wading depths depending on their design. For example: SUVs & Crossovers, often range from 400-800mm, depending on off-road capability. Some offroad vehicles exceed 800mm, with modifications like snorkels allowing for those deeper crossings enhancing both the driving experience and off-road adventures.
Within the third-gen to the fifth-gen Ford Ranger's, an already 30 year old vehicle with a large cult following still to this day, there is often a lot of after market support available for these vehicles, including options that cross-platform for your benefit with just a little modification.
Although we advocate for the DIY community, there are many people who do not have the resource materials, or proper tooling to produce some modifications that save you hard earned money, we get it but a snorkel kit from a reputable company offers several advantages over a makeshift setup, even if the DIY version seems functional at first.


Reputable brands use UV-resistant plastics, reinforced tubing, and precision-molded components that withstand harsh conditions. A homemade snorkel may degrade faster, especially under extreme temperatures or prolonged exposure to water and debris. Reputable kits also undergo rigorous testing to ensure they can withstand impacts, vibrations, and off-road conditions. A DIY snorkel may lack the necessary reinforcement, leading to cracks or failure under stress.
A makeshift snorkel may have gaps or weak points, increasing the risk of water ingestion—potentially catastrophic for your engine. Poorly designed DIY versions may restrict airflow or fail to filter contaminants effectively, leading to performance issues. Engineered snorkel kits ensure optimal airflow while preventing water and dust from entering the intake because of a precision-mold designed to fit your vehicle’s contours, ensuring a tight seal against leaks.
And finally where most things are judged. Aesthetic & Resale Value – A well-integrated snorkel enhances your vehicle’s appearance and resale value, whereas a makeshift version may look out of place or deter potential buyers and while a homemade snorkel might save money upfront, the risks—especially engine damage from water ingestion can far outweigh the initial savings. If you're serious about off-road performance and reliability, a professionally designed snorkel is a smart investment.
So where does that leave us today? The best approach blends reliability with customization—starting with a well-engineered snorkel and refining it to fit your specific build. Now, let’s break down the installation process, highlighting critical skills you'll gain along the way.
The following steps may seem more difficult than the job really entails due to the efforts of showing many details to highlight critical installation skills you will earn while taking on such a project. Lets show you whats involved.
Our Recipient Projekt Vehicle: 1993 Ford Ranger 4.0L V6 OHV
Difficulty: 6 out of 10
Time to Install: Took me about 3 hours, but my inner fender well was a fight. Plus I was taking my time and messing around on other things. Could be done in 2 with focus.
Disclaimer: 12° North Industries, The Ranger 12° North Staff, nor the original poster are responsible for you doing this modification to your vehicle. By doing this modification and following this how-to you, the installer, take full responsibility if anything is damaged or messed up. If you have questions, feel free to email us at sales@12degnorth.com or ask in the comments section below.
Tools Needed: – Drill – Hole saw set – Stepper bit [Unibit] – Basic socket set – Screwdriver set – Permatex Rubber Sealant (Now included in our kit*) / Caulking gun with tube of urethane/Hot-glue gun with black glue sticks [DO NOT use clear]
Parts Needed: – Our modded Safari snorkel kit, w/added components (Safari Snorkel SS60R) – your OEM air-box – the original hard air-duct from between the air-box and the rear of the headlight

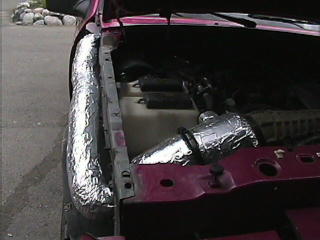
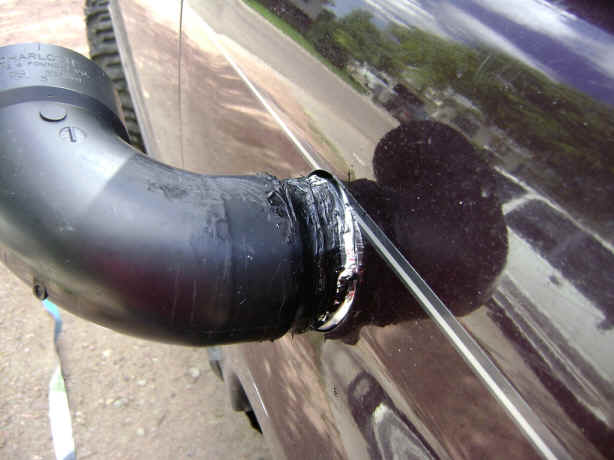
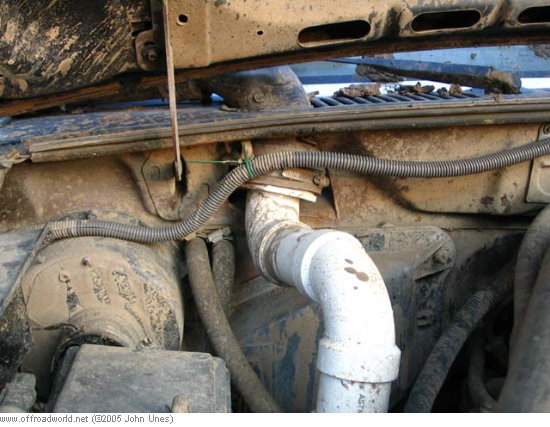
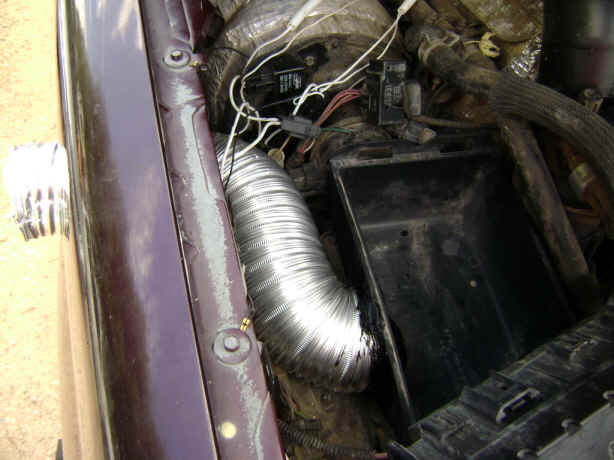
We spent some time with mocking up the factory air box utilizing OEM parts and a concept we have had success with. In comparison to some other installs we have seen of hokey duct-tape, PVC, and dryer vent.. 'NOT' options in our opinion. There is definitely an advantage to being creative in the sense of not cutting corners and having a completely & properly sealed intake box and intake charge tube from the snorkel.
We the use the existing OE air-cleaner box setups is better and not any of the offered aftermarket air-boxes or intake kits for use with snorkel modifications. We could honestly open up the arguments about those but that is another article to write. If you're trying to extract a few extra ponies from this setup or even without a snorkel kit installed, the OE box with an OE Styled dry or oiled cotton filter from the likes of AFE, K&N, Banks Power etc inside the OE box is a great way to achieve those smaller numbers and still protect your engine with the proper filtration needs.
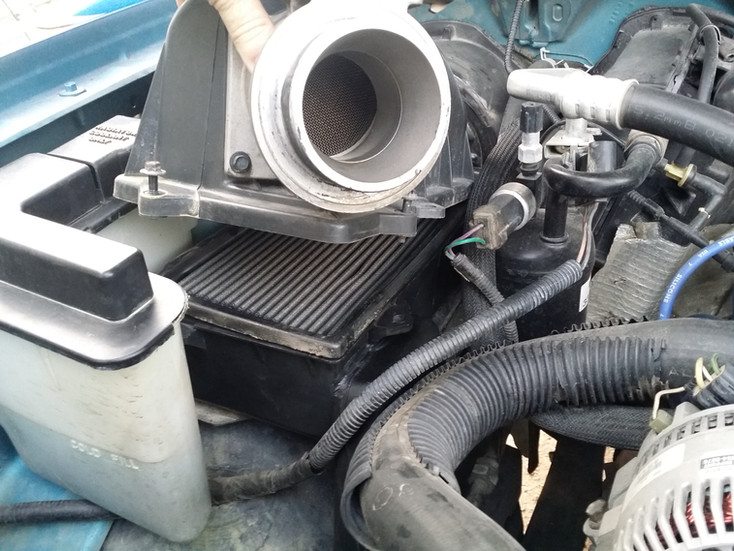
The combination of OE parts needed and the added components of our kit are critical in what makes the kit functional and possible. You will need the OE air intake sleeve that comes from behind the passenger side headlight and mounts to the lower OE air-cleaner box. A lot of people mistakenly remove this thinking it helps with performance and instead it just draws in the under hood heat notoriously known all Ford engines put out. We are currently trying to source these to include in our kits, contact us for details if yours is missing.

With the OE MAF to throttle body hose already removed and set to the side the area opens up letting you see whats going on as far as placement of components and where intake hose routing takes shape. You will have to start with the two small hoses at the rear of the top of the OE air-cleaner box top, disconnect carefully by squeezing the tab on the MAF sensor connection, and then removing the two 8mm hex bolts freeing the top and setting it aside until reassembly later.


There are two 10mm bolts facing upwards in the inner fender well that bolt through a stability bracket into the bottom of the OE air-cleaner box, one inboard between the Air-Cleaner box and the passenger side valve cover within a fender washer and rubber bushing, lifting upwards a little, you can now pull from the two rubber inserts with the stability posts from the fender freeing the lower, you should see just the OE air-cleaner box bracket below.


This is a time where I tend to clean all the parts being pulled from the vehicle that are going back in. This not only aids in that deep clean that is rarely received for your rig but it isolates forgetting nuts, bolts, and screws required to make for a clean & perfect install you would expect a professional shop to conduct. It also helps in identifying or troubleshooting any possible problems after the install.
In the next segment, we are going over the prep work of the lower air-cleaner box utilizing the OE air intake pick-up from behind the passenger side headlight, which is made up of a plastic sleeve that mounts to the air-cleaner box itself, an accordion style extension sleeve, fitted to a plastic funnel like air intake that is part of the design to pull cooler air from behind the headlight.
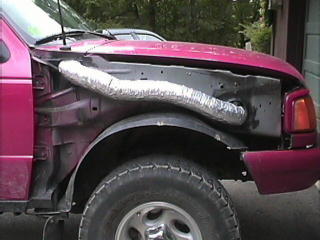
The OE intake tube that extends from the lower OE air-cleaner box to the pick-up behind the headlight is the only portion of the OE part you need and can be disassembled easily by drilling out the two rivets on both the fender and engine sides of the intake tube. There are some added skills behind this, drilling out just the center of the rivet to go just past the shoulder enough to cut through is all you need, its not about fully over drilling here. If the original rivet post is broken off in the center of the rivet head, an automatic center-punch is a great tool to have for removing those.
If your intake pick-up tube was already off or missing, this is process will seem quicker
If your intake pick-up tube is intact, a little pressure with a small flat-head or standard screwdriver or pry tool makes quick work, slide it in, press downward slightly and on the outside, rolling downward and outboard pressure towards the wheel well and the two pieces separate easily.
Once those parts are separated, again a great time to clean everything up inside and out. Our go to is Simple Green de-greasing agent on a typical 14x14 older microfiber rag. It is great for not leaving excess residue and getting into all of the tight places dirt tends to hide bringing back an almost new like appearance.


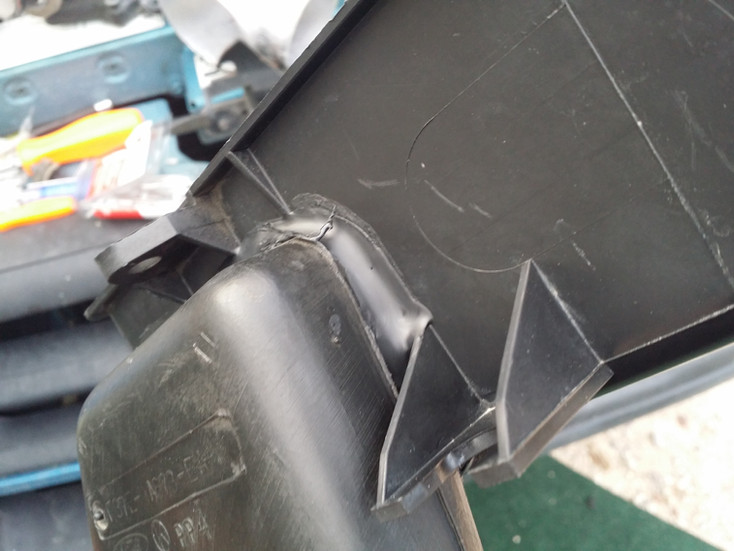
Using the original and cleaned air-intake piece with our included adapter takes a little finessing but its more about the alignment than the challenge of fitment. The goal is to get enough of the 2x3 ends to slide into one another in order to drill new holes for new rivets.
Once you get the fitment correctly on there, the OE intake pick-up will naturally create a slight bow in the bottom side of the intake pick-up tube, [see 4th image in gallery below]. and because the sides are snug, it has been our experience to rivet the top and the bottom side panels as seen below.
Doing so will draw the bow out of the bottom side, flattening it out to remove turbulence in the airflow. That is supposed to happen further down into the intake area to help atomize fuel properly, not before the MAF or MAP sensors on a vehicle.


Next we'll address the lower OE air-cleaner box and sealing it properly. Keeping with our professional standards of sealing air-cleaner boxes, we opt for urethane material used in a heated caulking gun, 100% silicone sealant is also available in black or clear, or you can choose to use a hot-glue gun with the black glue sticks. All work well, its more of the sealing process and attention to details that matter most when properly sealing the air-cleaner box.
There are three (3) holes you'll note in the bottom of the air-cleaner box, one forward towards the core support, one rear and towards the firewall, and a third hole that is three-quarters back but facing the engine. After taking a small file or piece of sand paper spun lightly inside these holes to scuff the edges so your sealant has something to bond to, all of these drain holes will get sealed.
The next step will entail pushing the 2x3 opening into the lower air-cleaner box**. Before doing so, we recommend wiping clean both parts with a damp rag removing any dirt allowing it to dry, scuffing the plastic inside completely. Please pay close attention to the fitment of the two parts and taking notice of how the irregular shape comes together before tracing 0.25" inward of the exterior lip with a similar 0.25" bead of urethane or silicone to create a deeper set seal before fitting the 2x3 fitting quickly in until it snaps in place--If you are using the hot glue gun method, we recommend running the thickest bead you can across the bottom only wrapping it up the bottoms of the sides ONLY and quickly pushing in the 2x3 end into its mount in the side of the lower air-cleaner box catching the glue while its still warm if not hot.
Now that we have the general fitment of the intake sleeve to the lower air-cleaner box, we can turn our attention to progress of the rest of the lower air-cleaner box. In order to ensure the complete sealing off of the intake sleeve we will be closing off both the interior and exterior giving us the end results we need for a non-fail installation to advert a catastrophic failure leading to hydro locking your engine.
Tracing the inside edges and corners around the 2x3 opening, a generous bead of your chosen sealing media should be used to fill the entire gap around the opening, including the visible locking mechanism on the top surface. We prefer Permatex Rubber Sealant because it behaves a lot like hot glue inside these OEM airboxes — it fills voids well, stays flexible, and doesn’t harden or crack even in colder climates.
If you choose to use 100% silicone, it works too, but you’ll need to scuff the mating surfaces with 220‑grit beforehand. Silicone needs a mechanical bite, and the smooth ABS plastic of the airbox won’t give it anything to hold onto unless you rough it up first.
Once your sealant is applied, use your index finger inside a plastic bag or a pair of latex gloves to press the material into every corner and pocket. The goal isn’t to make it pretty — it’s to make it airtight. Be liberal, but intentional. You want to fully fill any voids or air pockets on the inside, then repeat the same sealing process on the exterior. Every physical gap should be sealed to prevent even the slightest chance of water ingress.


With the lower airbox fully sealed and the intake sleeve locked in place, we can move on to reassembly. This is the part where everything starts looking like a truck again instead of a science project. Once the sealant has skinned over enough to handle the box without smearing it everywhere, drop your air filter back into the lower box and make sure it’s seated correctly.
From here, reinstall the upper airbox lid with the MAF sensor still attached. Double‑check the two small breather hoses at the rear of the lid, confirm the MAF connector clicks positively into place, and reinstall the two 8mm bolts that secure the top half of the airbox. This is also a great moment to verify that nothing is pinched, twisted, or misaligned — because once the snorkel tube is routed in Part II, access becomes tighter.
At this point, the entire under‑hood portion of the snorkel system is complete. The airbox is sealed, the intake sleeve is adapted, and the OE components are reinstalled exactly where Ford intended them — just upgraded for a life that involves more water, dust, and adventure than the truck ever saw in 1993.
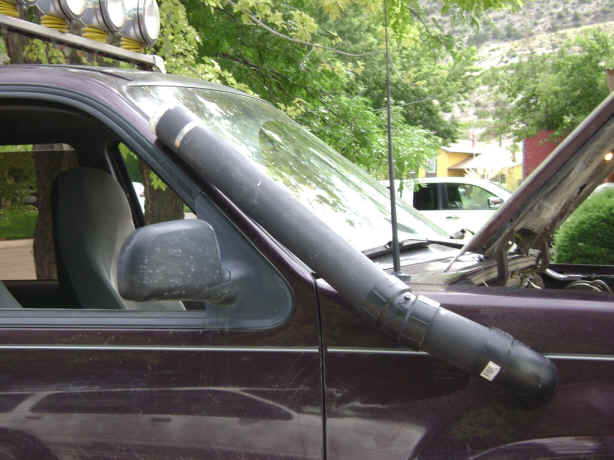
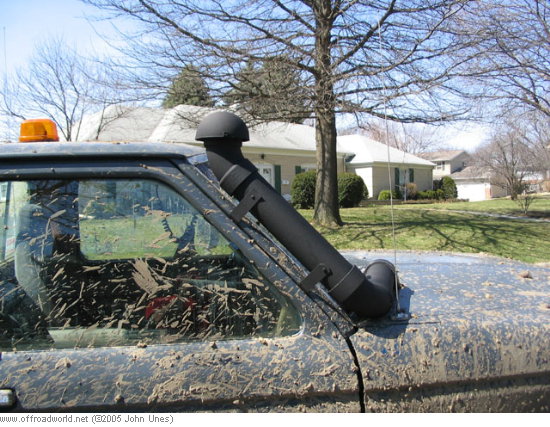
Part II is where the job gets real:
drilling the fender
aligning the snorkel body
routing the hose cleanly
dealing with the inner fender liner
and making sure everything seals up as tight as the airbox you just built
This is the part most people are nervous about, and it’s exactly why we’re breaking the article into two sections. Part I teaches the fundamentals and builds confidence. Part II shows the commitment — and the payoff.

12° NORTH INDUSTRIES
Sales: 702.781.0302
Email: sales@12degnorth.com
Website: www.12degnorth.com


Comments